Thursday, 14 February 2013

Paint Chip Art

I found this cool paint chip art idea on Pinterest and knew I had to have a go! 

All the paint chip samples I could find in local hardware stores were small strips with various colours on each card so I looked on the internet and found that Crown could send out A5 samples for a small price of 5 for £2.50.


I had a good look and picked 10 samples which cost me £5. 


I cut the A5 cards into 6 squares each measured 69cm x 69cm


I had bought a frame from a local antiques place for £10 so I lay the squares out on top of the glass to see what it would look like.


I didn't think that the squares looked good so I cut the squares diagonally into triangles. 


I then arranged them again on top of the glass to see how it would look.


After that I stuck the triangles onto a piece of A2 paper (or 2 A3's stuck together!) using some small pieces of double sided sticky tape.


Once the picture was finished I stuck it in my frame and hung it in my living room!


Please let me know if you try this in your home.

Happy Making

xx

Friday, 25 January 2013

A Patchwork Quilt

Wow, I can't believe it was August since I last posted!

My life has become quite hectic since then. 
In September my daughter, Bean, started Reception and my Son, Spud, started pre-school two mornings a week. Whilst I initially thought that this would free some time up to be more creative I soon found out that it wasn't the case. 

I used to think that mum's with children at school got to go to the gym more, drink more tea and eat more cake but unfortunately that isn't the reality for this mum. More child free time seems to equal more time to do grown up stuff like work, meetings and housework. 

I've looked back at the things I have made since August and there seems to have been a running theme - Quilts!

I made my very first quilt when I was 15 years old. My grandma had passed away and a friend of mine, who was a genius quilt maker, came up with the idea to make a quilt to help me through my grief and to have something to remember my grandma by. 

My mum had given me £100 from my Gran's money and I bought myself my very first sewing machine (which happens to be my one and only sewing machine) which I still use to this day.

It was such a lovely time to learn how to quilt whilst working on my machine which I'd bought with my inheritance.

My first quilt is still in use to this day and you can usually find me snuggled under it, on the sofa, during these cold nights. I love the fact that patchwork quilts have such longevity and are usually kept for years - sometimes being passed down from generation to generation. 

I had a little accident with my quilt in my late teenage years and spilt some dark nail varnish on it. I stored it in my cupboard for many years until I moved out of my family home and decided to tackle the mess. I applied an appliqué tree and intended to add more at a later date, which I'm yet to do. But I guess it's a work in progress! 

Here is my first quilt that I made with my friend Rosie at age 15....


I then didn't make another quilt until I was asked by a friend of mine, in 2011, if she could commission me to make two cot quilts for her as she was expecting twins. As I had always wanted to make another quilt and as I was super excited for her twins arrival, I could only say yes!


Here are the results:

Archie's quilt....


Coco's Quilt....


After that I was hooked and wanted to try perfect my craft so I made two more in 2012

Coral's quilt....


Nico's quilt.....


I have always wanted to make my own children a quilt each and thought that it would be a perfect christmas present for them both. Unfortunately time was running out and Christmas was approaching fast. I had bought the wadding and didn't want to rush the patchwork quilts so decided to make them a quilt each out of two full pieces of fabric. I chose pattern fabric that I knew they would both like and managed to make them one each before Christmas. I'm glad I did as it's been quite cold since then and they have been a very welcome addition to their bed covers!

Bean's quilt....


Spud's quilt....


I've really enjoyed making all these quilts, but as a self confessed perfectionist I still feel like I have a long way to go before I am truly satisfied! 

I have  no method to teach you as I have done them all differently along the way. 

There are some really useful websites that can give some great advice and there are also some brilliant quilting magazines out there too.

I would also love to do a quilting course one day, just to see if I'm actually doing it correctly!

Quilting looks quite complicated but if you get your measurements correct at the start then it's actually quite simple when you get into it. 

I have another quilt in the pipe line and I'm sure there will be more to come throughout this year. After making the children one each for Christmas and using mine most evenings during these cold nights, it's probably time I made one for my poor cold hubby ;0) 

Until next time friends,

Happy Making xx 


Friday, 17 August 2012

Mini Make


This week I held my very first Mini Make workshop! 

17 children aged between 4-10 years came along and allowed me to teach them the art of print making for an hour and a half, and we had lots of fun!

I've been doing workshops with teenagers for around 4 years now and have always enjoyed helping set their creativity free, and I found working with younger children just as exciting.

There were 5 stations where they could explore a different technique on paper then after a short refreshment break they designed a fabric bag.


All the children were so well behaved and the workshop managed to keep their interest right until the very end.

Plans are now being put together for a Mini Make & Bake in the October half term so watch this space....


Until next time,

Happy Making xx 

Thursday, 19 July 2012

Personalised mugs

Here's a really quick and simple way to personalise a mug for a gift or for your own home.
I tried it out on Monday with Bean to give to her classroom assistants as a gift when she leaves nursery this week.

Here's her result:


On our Monday Make night we decided to give it a try too. 

Here's what you need:
A white mug
A Sharpie marker (I just had black but you can also buy coloured ones too)

Here's what to do:
Draw on your mug with your marker.
Place in the oven for 30 mins gas mark 4, 350F, 180C

Once cooled you can then use it. 
Hand-wash only, not suitable for the dishwasher.

Here's our results:


Be free...


I moustache you something!


Here's my lovely friend Carly with her creation!


Until next time,

Happy Making xx


Thursday, 5 July 2012

Multicoloured crayons

I don't know about you but our crayon pot always seems to have hundreds of little bits of crayon at the bottom that never get used.
I was sorting through our craft drawers yesterday and was about to tip all the broken bits into the bin when I remembered an idea I'd seen on Pinterest a while ago.
I went to the cupboard and got out a rubber ice cube tray from Ikea and put all the bits into the water sections (making sure all the paper was removed first.)


I then put the tray into the oven on 40 degrees/gas mark 3 for 15-20mins. After they were all melted I carefully took them out of the oven and left them to cool. Once they were set I removed them from the ice cube tray.
And voila we have new, multicoloured crayons!


N.B be prepared to throw the ice cube tray in the bin after as you definitely won't want to make ice in them again!

Happy Making xxx

Tuesday, 8 May 2012

Like a 4 year old!

My little girl (Bean) is 4 and she is definitely walking in her mummy, and daddy's, footsteps when it comes to creating!
The other day she decided she wanted to make paper cupcakes and came up with the design all by herself. The results were really impressive (considering her age) and definitely blog worthy!

Here's the equipment Bean told me she needed to make her paper cupcakes;

Pink paper
Sellotape
Cotton wool
Pink glitter glue
A straw cut up into little bits (to use as sprinkles)
Cupcake cases

First She wrapped the cotton wool in a square of pink paper and secured it with tape.
Next she put glitter glue on top and sprinkled the bits of straw onto the wet glue.
Finally she placed them in the small cupcake cases.

Here is the result!


Last week I bought Bean a shadow box from off eBay. When it came I decided it was a little bit too plain, so instead of painting it we decided to decoupage it!

Here is how it looked before:


(I forgot to take a before photo so I had to use this one from off eBay!)

Here is how it looked after:


And with some of her little ornaments:


The other week Bean came up with the idea of a story she wanted to write called The Brush and The Broom. Along with her clever Daddy they created this very cute little video .... what do you think? An animator in the making maybe?!


I've finally finished a quilt I've been making for my friend's baby girl. My intensions were to give it to her as a gift the first time we were introduced, but it wasn't quite ready - oops! She's now 4 months old, oh how that time has flown by!
Once the quilt is safely in the nursery of my friend's gorgeous little girl then I'll post it on here for you to see the result!

So until then....

Happy Making xx

Monday, 23 April 2012

Charlie and Lola house

I'm a huge fan of Pinterest and love the concept of virtual mood boards as a way of inspiration. One of my boards is dedicated to craft ideas for my children. I was showing Bean, back in January, all the lovely ideas I had 'pinned' for her and Spud, in particular a beautiful idea of a dolls house in a small suit case. (Click here to see it in all it's fabulous glory!)
My idea had been to work on my own version of it whilst Bean was in bed and then give it to her for her Birthday. Unfortunately she had other ideas and for a month didn't stop asking me if we could make it!
I guess my mistake was showing her the idea in the first place, but I had wanted to see her reaction and see if all the effort would be appreciated!


Bean was desperate to make this project together and after seeing the Charlie and Lola stage show on New Years Eve, she had made up her mind that she wanted it to have a Charlie and Lola twist!
When she was hit with a bug that month I decided we should get to work on it to pass the time. So whilst Spud was having his naps we got all her Charlie and Lola books together for inspiration and got creating.


It's taken us a while, catching half an hour here and there, but we have finally finished. It isn't how I visualised it but it's exactly how Bean wanted it, so I'm happy!


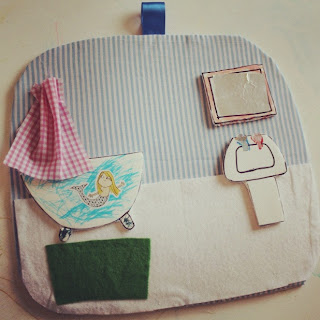
All the rooms store in the lid of the vanity case and the dolls and clothes store inside too.


Here's what we used:
An old vanity case
Cardboard
Foam board
Fabric
Felt
Ribbon
Buttons
Stickers to decorate
Glue gun
Thread
Toy stuffing


We found a vanity case in my mum's loft which was perfect for this project!


We cut the card (x4) to size so it fitted neatly inside the lid of the vanity case and then planned out each room on the card.


We made paper stencils


We then cut out the furniture using the foam board and Bean coloured them in using felt tip pens. I used a Sharpie marker to draw the detail.


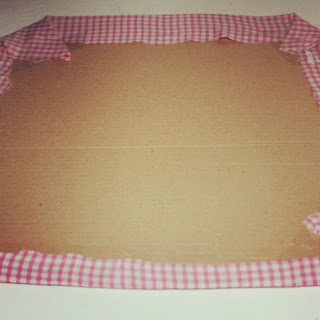
We covered the boards using fabric and a glue gun on the front and felt on the back, trapping some ribbon in between to use as a handy tab.


We then stuck the furniture onto the fabric using the glue gun again.


We decorated the front of the vanity case to look like a house using felt.


Next we made Charlie and Lola by cutting them out of pink felt and hand sewing the face detail on with black thread. (this was done by me whilst Bean was in bed!)


Stuffing them with toy stuffing


We used small pieces of yellow felt for their hair and coloured felt for their clothes and shoes. 
We made Charlie's jeans out of some scrap denim.


Bean helped me with the sewing of Lola's dress and shoes. She's actually quite good at hand-sewing!


Lola Has buttons at the back of her dress so that we can make some more clothes for her and swap them over.


I've really enjoyed doing this project with Bean and will miss having something to go to when we have some spare time. Here it is completed....


She is now asking me if I can teach her how to sew on a sewing machine! I'm a little nervous as she is only 4 but I guess we have to start somewhere!
Wish me luck, and until next time...


Happy Making!

xx